


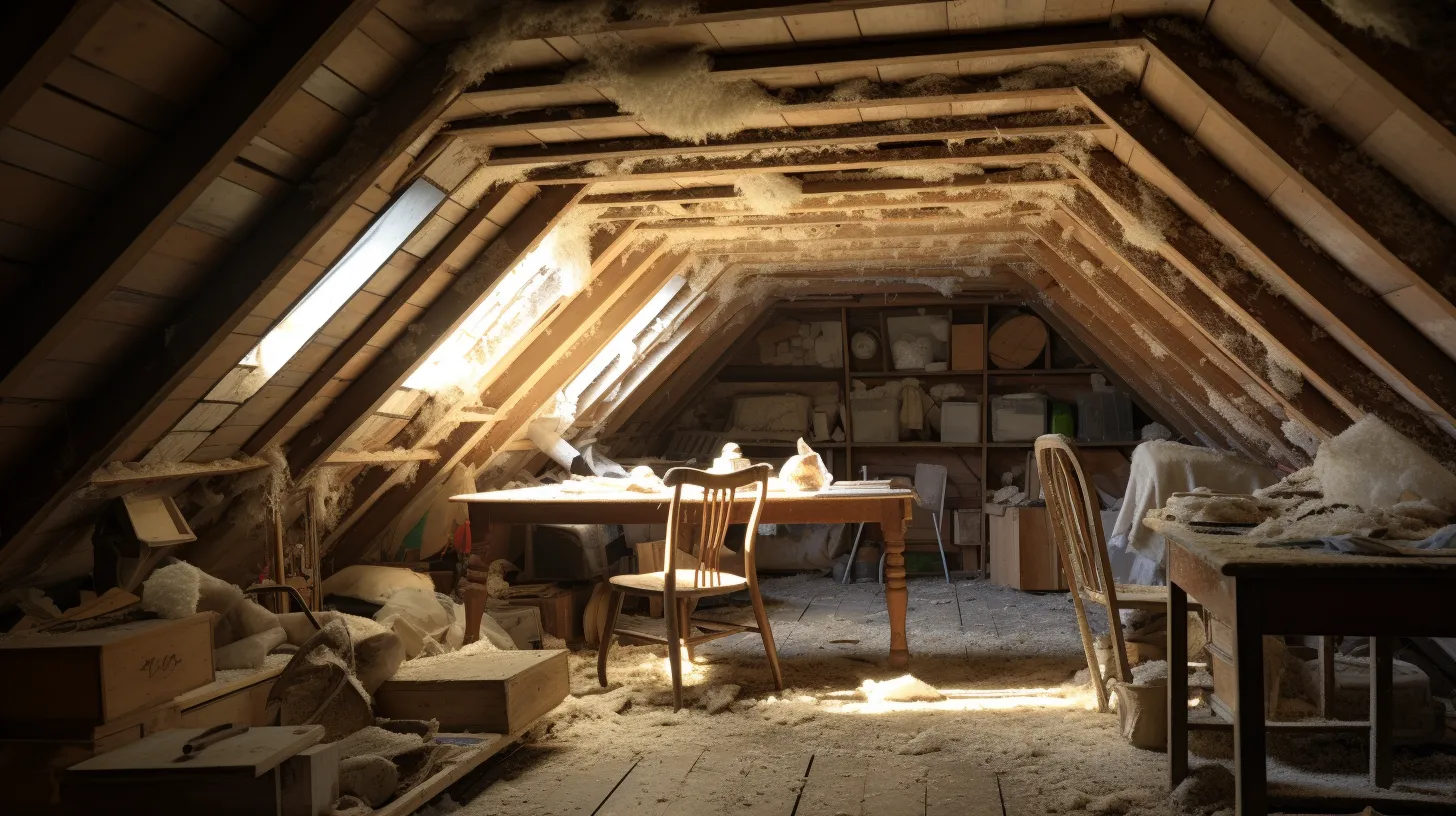
Your home’s coziness and energy efficiency may take a hit from old or worn-out attic insulation.
Dust buildup, pests making themselves at home, or moisture damage in your insulation pose not just health risks but also hike up your energy bills by compromising insulation performance.
Streamlining the attic insulation removal is crucial for preserving your home’s well-being and creating a healthy living space.
We’ve gathered essential steps for a safe and efficient insulation removal process.
Should You Remove Old Attic Insulation?
To remove or not to remove old attic insulation? That’s the question that could make a significant impact on your home’s energy efficiency and air quality. As insulation ages, it loses its effectiveness and can turn into a haven for excess moisture, mold, or unwanted pests.
Here are some signs to help you decide if it’s time to replace your attic insulation:
1. Visible Deterioration or Damage: If you see wear and tear on the insulation material, it’s a clear indicator.
2. Unexplained Increase in Energy Bills: A sudden spike in energy costs might be pointing to potential energy loss through compromised insulation.
3. Evidence of Pest Infestations: Any signs of rodents or insects taking residence can undermine the integrity of your insulation.
4. Moisture Issues: Water stains or a musty smell could signify that your insulation is compromised.
If you notice any of these symptoms, it’s a good idea to dig deeper. A thorough attic inspection can confirm whether insulation removal and replacement are necessary. In cases involving elements like asbestos fibers or mildew, it’s crucial to bring in professionals for remediation to protect your household from health risks.
Always remember, the condition of your attic insulation directly affects your energy costs and overall home comfort.
How Long Does It Take To Remove Attic Insulation?

When you’re tackling the task of removing attic insulation, one burning question likely comes to mind: How long will it take? Well, there’s no one-size-fits-all answer because the duration depends on various factors. One crucial factor is the type of insulation; methods for removing fiberglass insulation batts differ from those for blown-in cellulose.
The size and accessibility of your attic also come into play. Smaller, easy-to-navigate spaces can be cleared in a day, but larger or obstructed areas might stretch the timeline to several days. Issues like rodent infestations or moisture damage can highlight the importance of a thorough removal process, potentially adding to the time needed.
How To Remove Attic Insulation
Taking on the challenge of removing attic insulation is a substantial undertaking that can enhance your home’s energy efficiency, air quality, and overall comfort.
Whether you’re dealing with blown-in cellulose or wrestling with fiberglass batt insulation, the extraction methods will vary.
As we lead you through the process, you’ll uncover the intricacies that set each insulation type apart, the vital tools required for the job, and the methods to safely replace old or deteriorated layers.
Allow your path toward a well-insulated home to be knowledgeable and systematic, commencing right here with the fundamentals of insulation removal.
Removing Blown-In Cellulose Insulation
Step 1: Turn Off Power to Electrical Fixtures : Ensure safety by turning off the power to any electrical fixtures in the attic. This precaution is essential as you navigate around potentially exposed wire junctions during the insulation removal process.
Step 2: Use an Insulation Removal Vacuum : Employ an insulation removal vacuum to safely and effectively extract the blown-in cellulose material. This tool is crucial for preventing the dispersal of insulation particles into your living space, maintaining a clean removal process.
Step 3: Seal the Work Area : Thoroughly seal the work area to prevent the spread of dust and insulation particles. This step is vital for containing the materials and ensuring a controlled removal process.
Step 4: Methodically Direct the Vacuum Hose : Systematically direct the vacuum hose across all areas of the attic. This approach allows you to capture loose fibers in a controlled manner, ensuring that potential irritants are contained and not released into the surrounding environment.
Step 5: Pay Attention to Detail : During the insulation removal process, pay close attention to detail. This meticulous approach will yield long-term benefits, contributing to cleaner air and a more efficient energy profile for your home.
Removing Fiberglass Batt Insulation
Step 1: Wear Safety Gear : Prioritize safety by wearing appropriate protective gear, including a proper insulator, to guard against irritation from the glass fibers present in fiberglass batt insulation.
Step 2: Lift Each Batt Gently : Once properly geared up, gently lift each fiberglass batt. Exercise caution to avoid disturbing wires and pipes that may be underneath. Unlike blown-in cellulose, fiberglass batts are more structured and can be rolled up for straightforward removal.
Step 3: Inspect for Moisture or Pest Activity : While removing the batts, stay vigilant for any signs of moisture or pest activity in the attic. These signs could include discoloration, water stains, or pest droppings. If detected, further inspections or treatments may be necessary.
Step 4: Dispose or Bag Directly : Fiberglass batt insulation typically doesn’t require a vacuum. Instead, it can often be bagged directly for disposal. Ensure proper disposal procedures are followed according to local regulations.
Step 5: Conduct Additional Inspections if Needed : Keep an eye out for any anomalies such as moisture issues or signs of pests. If detected, consider additional inspections or treatments to address underlying problems and ensure the attic space is in optimal condition.
Attic Insulation Removal Costs

Cost will determine if the attic insulation removal is something you want to risk doing yourself or if you want to hire a professional – we get it. The expenses can vary based on factors like attic size, insulation type, and any issues like pest infestations or water damage. These factors directly impact the price you’ll pay for insulation removal services.
On average the cost of attic insulation removal removing old attic insulation typically ranges from $1 to $2 per square foot.
For instance, for a 1500-square-foot attic, the removal cost is estimated to be between $1,500 and $3,000. Keep in mind that this is a general estimate, and the actual cost may vary depending on specific circumstances.
Should I Remove Attic Insulation Myself Or Hire A Pro?

Consider hiring professionals for attic insulation removal rather than attempting it as a DIY project. This task involves complex challenges, including handling hazardous substances, ensuring thorough removal, and avoiding damage to your home’s structure.
Professionals come with the right tools and extensive knowledge of various insulation types and effective removal methods. Their experience allows them to quickly identify and address unforeseen issues like hidden mold growth, leaks, or structural weaknesses.
Hiring experts ensures compliance with safety regulations, especially important if your home has older insulation containing asbestos or other health hazards. Trained professionals will also dispose of the old material responsibly, considering both environmental and legal aspects.
Choosing insulation contractors provides peace of mind and assurance that the job is done correctly. It not only saves time but also prevents future problems, efficiently and safely restoring your home’s insulation system.
Seeking Professional Help for Attic Insulation Removal

Deciding to remove your attic insulation is a big step to keep your home efficient and comfy. When you think about how to go about it, focus on three main things.
First, get estimates from experienced professionals to make sure you get good value and expertise. This step helps you make a smart decision.
Next, get ready for the actual removal. Know what to expect and take steps to make it go smoothly. This prep work is crucial for a successful insulation removal.
Finally, after taking out old or worn-out insulation, expect a phase in the removal process. This step is important before you can fully enjoy the benefits of your investment – a healthier and more energy-efficient home.
By following these steps, with the help of professionals, you’re on your way to achieving the best home insulation.
Step 1: Gather Estimates
If you’re thinking about removing attic insulation, your first step is to get estimates from trustworthy insulation contractors. This is crucial for setting the stage for a successful project:
1. Request Detailed Proposals: Contact multiple companies and ask for detailed proposals that outline their services.
2. Compare Services, Timelines, and Costs: Evaluate and compare the services they offer, how long the project will take, and the costs involved.
3. Review Customer Feedback: Check customer reviews to see how reliable and satisfying each contractor’s work has been for others.
Getting estimates helps you understand different approaches and prices, allowing you to find a balance between cost and service quality. Remember, the lowest bid might not always give the best value, so focus on quality and safety when making your decision.
Step 2: Prepare for Removal
As you prepare for this task, clear the work area by moving valuables and making a clear path for the contractors. Make things clear about parking, access, and workspace to ensure the team can work quickly and safely on the removal day.
Talk to the insulation removal service about how to prepare, considering your home’s structure and the insulation material. Confirm the schedule, discuss ways to protect areas not affected by the project, and set up ways to communicate in case anything unexpected comes up during the project.
Step 3: Clean Up and Enjoy!
After removing the old attic insulation, the final phase kicks in – clean-up. Professionals meticulously clear any remaining debris, ensuring your attic is ready for new insulation or other renovations. As insulation experts do their job, your home gradually returns to a tidy state, ready to support a more energy-efficient future.
With the clean-up done, you can now enjoy the improvements to your home. Enhanced energy efficiency and refreshed air quality are now within reach, promising comfort throughout the seasons. Take a moment to appreciate the expert care that has paved the way for lower energy bills and a healthier living environment. Now, relish the peace of mind that comes with a professionally handled insulation project completed to perfection.
Contact Universal Installation Doctor for a Free Estimate on Home & Attic Insulation

Are you thinking about improving your home’s energy efficiency by removing outdated attic insulation before winter? Reach out to Universal Insulation Doctor for a professional assessment of your home’s insulation needs, allowing you to take the first step towards a more comfortable and cost-effective living space.
Experience the ease of obtaining an accurate estimate with no hidden fees or surprises. Our insulator experts are standing by to provide you with a free, no-obligation quote, giving you clear insight into the potential costs and benefits of updating your home’s insulation.
We back our work with a 100% satisfaction guarantee. If you are not 100% satisfied with the work performed, we will return at no charge.
With an A+ rating with the BBB, We offer a quality service for the best value is most important to your budget.
Added Bonus: The Universal Insulation Doctor recognizes that uncovering a contaminated insulation issue can be an unexpected surprise. To ease this situation, we provide “SmartPay,” our exclusive service now, pay later option. Call today for a Free Insulation assessment.
Frequently Asked Questions
Can i remove attic insulation myself or should i hire a professional?
While it is possible to remove attic insulation yourself, it is advisable to hire a professional insulator. Professionals have the expertise, equipment, and knowledge of safety precautions to manage potential hazards like asbestos exposure, rodent infestations, and contamination effectively.
How much time does it typically take to remove attic insulation?
The time it typically takes to remove attic insulation can vary widely—factors like the size of the attic, the type of insulation, and the removal method play into the timeline. Generally, a professional insulation company team can complete an average-sized attic in about 4 to 8 hours.
What is the average cost of attic insulation removal?
The average cost of attic insulation removal varies depending on several factors, including the amount of insulation, the type of material, and the condition of the space. Generally, homeowners can anticipate spending anywhere from $1 to $2 per square foot.
Why should i consider hiring universal insulation doctor for my attic insulation removal needs?
Choosing Universal Insulation Doctor means entrusting your attic insulation removal needs to experienced insulation contractors who specialize in safely and efficiently addressing insulation challenges in the Hampton Roads area. By emphasizing quality workmanship and customer satisfaction, insulator they offer tailored solutions that improve your home's energy efficiency and air quality.


