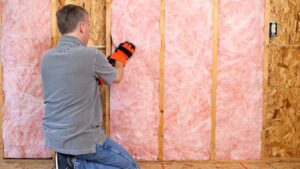
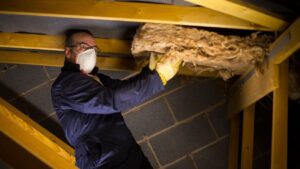
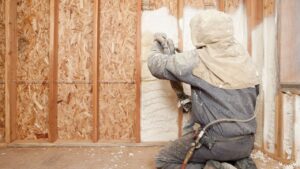
Since the temperature dropped you may have started to notice drafts in certain parts of your home. A draft is not always a situation you have to live with – with the right insulation the draft can be eliminated and you can finally fold and put away your thick blankets. What’s wild is that a typical home experiences approximately 30% heat loss from drafts, mostly near windows, doors, and fireplaces.
Homeowners may also notice cold spots along walls or floors. If you found out you life in a drafty house, here are some tips to help prevent heat loss and eliminate drafts from a company who’s worked for years helping families keep their home warm and cozy.
Know the Common Sources of Air Leaks

If you’ve been in your house for a while, you probably know where some drafts are because you’ve felt them. Even though windows and doors are usual suspects, EnergyStar says many drafts sneak in from hidden spots in your home, like:
– Opening to the attic
– Holes for wiring (cable TV, outlets, phone lines)
– Side walls supporting attic rafters (knee walls)
– Plumbing vents
– Lights that are set in the ceiling and the part around them (soffit)
– Furnace pipes or ducts
– Meeting point of the foundation and wood framing (rim joists in the basement)
Identify your Home’s Air Leaks

Your first step has to be to find where air is getting in to cut down on drafts and save on energy costs. Follow these tips to help you identify and fix air leaks.
Do a Visual Inspection
The Department of Energy (DOE) suggests starting with a thorough visual check inside and outside your home. Look for openings like gaps and cracks in common areas where air might sneak in, such as knee walls, dryer vents, outdoor faucets, attic hatches, and sill plates. Pay special attention to the outer walls, doors, and other openings. Make note of any cracks or gaps so you can seal them later.
You can also do a simple test to complement your visual inspection. The DOE provides different methods, but here are the steps for a DIY smoke test:
– Choose a cool and windy day, and turn off appliances like the furnace, water heater, clothes dryer, and bathroom fans to eliminate air disturbances.
– Close all windows, exterior doors, and fireplace flues.
– Light a stick of incense and hold it near potential points of air leakage (refer to the list of common leakage points mentioned above).
– If the smoke wavers back and forth, gets sucked out of the room, or blown into it, you’ve found an air leak.
Get a Professional Inspection
You can also get help from a professional to find air leaks through a home energy audit. This typically involves a blower door test, where a strong fan is attached to an exterior door frame. The fan pulls air out of the house, lowering the pressure inside and letting outside air flow in through cracks and openings. Professionals often use a smoke pencil, similar to the smoke test mentioned earlier, to identify leaks. The blower door test not only pinpoints air leaks but can also evaluate how airtight your home is overall.
Universal Insulation Doctor can give your house it’s energy assessments. If you’re interested, contact us for recommendations from our professional energy auditors.
Tools for Sealing Air Leaks in Your Home and Ensuring Safety
Now that you’ve found where air is sneaking into your house, let’s talk about the tools you can use to fix it. Caulk and spray foam are like magic for sealing up gaps in things that don’t move, like window frames (use caulk for small holes and spray foam for slightly bigger ones. For things that do move, like doors and windows that open, you need weatherstripping to stop the drafts (put it between the frames and moving parts). Depending on your job, you might also need some special stuff like heat-resistant caulk, metal flashing, or shiny foils.
Here’s a key point to remember: Sealing up your home might unintentionally cause another issue — it could trap bad stuff like radon or carbon monoxide inside, making it unsafe. We recommend getting a professional to test for radon and check if your heating gadgets might be letting out harmful gases. This is something you should do both before and after fixing any air leaks. You might even need fans to keep the air in your home safe.
Prioritize your Projects

So, if you find multiple areas where heat loss is occuring where should you start? Start at the biggest holes and work your way to the smallest.
Attics
Begin with your attic – it’s a key area to focus on. We recommend not getting overwhelmed by every small gap; instead, target seal the largest holes initially. This method can result in substantial energy savings.
Attic air sealing might include creating pockets of fiberglass insulation to seal open stud cavities and gaps behind knee walls. You can also use reflective foil to cover soffits and install aluminum flashing around openings near your furnace and water heater flues.
Basements and crawl spaces
Moving on, your next opportunity for savings could be addressing the basement and crawlspace. Sealing air leaks in these areas can prevent chilly floors and reduce drafts from beneath. A project for sealing air leaks in the basement might involve using spray foam or caulk to seal cracks and openings in the walls, ceiling, or floor.
It’s essential to seal along the gap between the sill plate and the foundation and at the bottom and top of each rim joist (where cement walls meet the wood frame) at each end of the house. Additionally, remember to seal the openings around gas, water, and electrical lines, ducts, and wiring that extend to the outside (such as your dryer vent). Larger holes may require insulation pieces to cover them effectively.
Doors and windows
While drafts around doors and windows are usually the most noticeable, sealing them tends to have the smallest impact on your energy use. However, because these areas are easily accessible, and the solutions are usually straightforward, they provide an opportunity for a simple do-it-yourself job that can help minimize noticeable drafts.
For a door or window air sealing project, you might use self-adhesive weatherstripping (felt, vinyl, rubber, or silicone) along the sides of windows or install a door sweep to seal tthe space between the bottom of the door and the threshold. Additionally, you can apply plastic over windows and place inexpensive foam gaskets (available at most hardware stores) behind electrical outlets on perimeter walls.
Whether you tackle these draft-stopping projects yourself or enlist the help of a professional, once you’re finished, you can enjoy a cozy home and save some money on your energy bills.
Call Universal Insulation Doctor to Remove your Home’s Winter Drafts

When winter weather arrives, you need to make sure your home stays warm and doesn’t have any chilly drafts. Checking your insulation is a smart plan to stop the cold air from sneaking in and the warm air from escaping.
Don’t just guess where the problems are; let Universal Insulation Doctor inspect your home. They’re experts at figuring out what your insulation needs are. Use a professional inspection to find and fix the cold spots, making sure you’re home is cozy all winter.
With next day service, competitive pricing, and Hampton Road’s happiest customers there is no better time than now to have your home insulated by the Doctor.
Frequently Ask Questions
How does a professional insulation inspection contribute to a cozy home?
A professional inspection identifies insulation issues accurately, allowing for targeted solutions that contribute to a cozier and more energy-efficient home during the winter.
What is the overall impact of tackling insulation issues?
Addressing insulation issues ensures a home that is better equipped to combat the cold weather, preventing drafts, reducing energy bills, and enhancing overall comfort.
How long does an insulation inspection typically take?
The duration of an insulation inspection varies based on the size of the home and the complexity of the issues. On average, it may take a few hours, but this ensures a comprehensive evaluation.
Is it cost-effective to invest in insulation improvements?
Yes, investing in insulation improvements is cost-effective over time. The energy savings achieved by preventing drafts and heat loss often outweigh the initial investment, leading to reduced heating costs.
Are there DIY insulation options available for homeowners?
While some basic insulation measures can be done by homeowners, for a thorough and effective solution, professional assistance is recommended. DIY options may not address hidden issues and could result in incomplete insulation.

