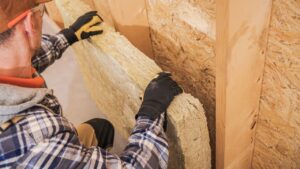
Attic insulation, particularly the blown-in variety, proves to be an excellent remedy for enhancing your home’s resistance to heat and boosting energy efficiency.
This insulation method effectively blocks the intrusion of heat during summer, preventing cool air from escaping, and reversely, in winter, it keeps warmth inside.
By opting for blown-in attic insulation, you not only contribute to a more temperature-regulated home but also stand to reduce your heating and cooling expenses by more than 20%. Despite its advantages, many individuals lack a clear understanding of what blown-in attic insulation entails.
This guide aims to provide you with essential insights and address common queries surrounding this insulation technique.
What is Blown in Attic Insulation?
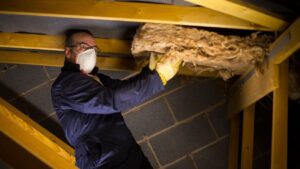
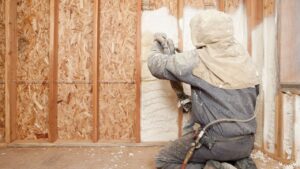
Blown-in insulation involves blowing loose insulation material into walls, attics, or gaps using special equipment with a tube or hose. The materials for blown-in insulation can be made from cellulose, fiberglass fibers, or styrofoam pellets.
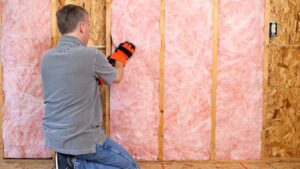
During home construction, long strips of fiberglass insulation are typically placed between wall studs and ceiling joists before adding sheetrock.
Over time, this insulation may settle, creating small openings where air can escape, leading to heat loss. Re-installing these strips can be challenging, especially in areas like unfinished attics or spaces with obstacles.
This is where blown-in insulation comes in handy. It helps prevent heat from escaping, improving the home’s R-value, which is important for energy efficiency.
Blown-In Insulation R-value
R-value is a measure that tells us how good insulation is at keeping heat in or out. It’s like a grade for insulation effectiveness, and it’s measured per inch of insulation thickness. The higher the R-value, the better the insulation.
When it comes to blow-in insulation, the R-value depends on how much of it you use. A thin layer might have a lower R-value, suitable for warmer areas like southern attics.
On the other hand, a thicker layer, especially when added on top of existing insulation, can give you a higher R-value, which is great for colder regions like those dealing with Midwest winters. To find the right R-value for your location, you can check with Energy Star or ask your local home improvement store for guidance.
Blown-In Insulation Advantages
– Efficiency Boost: Placing insulation around small openings not only keeps your home warm in winter but also stops cool air from slipping away in summer. This means your heating and air conditioning systems won’t have to work overtime.
– Fire Protection: Small spaces can fill with smoke during a fire. Filling them with insulation creates a tight seal, enhancing fire safety in your home.
– Easy Setup: Blown-in insulation is a breeze to install with a hose and usually takes just a few hours. Installing fiberglass rolls involves more invasive work, like tearing into walls.
– Bug and Critter Defense: Some blown-in insulation types are treated with borates, warding off potential insect or critter invasions in your attic.
– Smart Investment: Although the initial cost of blown-in insulation is around $1,600, the long-term energy savings make it a cost-effective choice over time.
Blown-In Insulation Disadvantages
– Professional Expertise Recommended: Given the need to drill between studs containing electrical wiring, professional installation is usually recommended. However, in an unfinished attic with the right tools and protective gear, it can be a DIY project.
– Watch the Weight: Excessive loose-fill insulation on an attic floor may cause the ceiling below to sag due to the added weight.
– Mess Factor: Installing loose-fill insulation can get messy, requiring appropriate protective gear and extra effort for cleanup.
– Avoiding Recessed Lights: Blown-in insulation, although fire-resistant, can become too hot near recessed lights, potentially causing issues. Proper spacing is crucial to prevent overheating and bulb burnouts.
– Appearance Concerns: During installation, holes are drilled in the home’s exterior filled with plugs matching the wall color. While siding is easily matched, plugs may be more noticeable on brick, stone, or stucco exteriors.
– Not Water-Resistant: Installing loose fill in a dry area is vital. Water can affect the insulation’s effectiveness, leading to mold or mildew. Seal gaps, address leaks, and prevent ice dams before installation for optimal performance.
Types of Materials Used for Blow-In Insulation
Discover the various materials employed in the installation of blown-in insulation to help identify the most suitable option for your home.
Fiberglass
Fiberglass, produced by spinning molten glass into fibers, is versatile and can be utilized to create long rolled batts or blown-in insulation. It is often the most cost-effective option, making it a popular choice in modern home construction.
Nevertheless, handling fiberglass requires care as it is made from glass and can be harmful if inhaled. Additionally, it may lose its R-value more quickly than other materials in severe conditions, making it important to consider if you reside in a colder climate.
Cellulose
Cellulose, derived from recycled paper and treated with a fire retardant, is a fiber type commonly used in insulation. Although it may come with a higher price tag, it boasts a superior R-value and is considered environmentally friendly and safer for your family.
Mineral Wool
Mineral wool, often referred to as “rock wool,” is a fiber-based insulation material available in blankets or as loose-fill. Crafted from recycled materials and rock minerals, it boasts a denser weight, allowing it to snugly fit into confined spaces.
This insulation type offers additional advantages such as fire protection, soundproofing properties, and a high R-value. However, these benefits come with a higher price tag, averaging between $1,700 to $2,400 for 1,000 square feet of wool insulation.
Common Uses for Blown-In Insulation
Blown-in insulation is a flexible insulation material suitable for various locations, except for roof insulation where it needs to be placed behind panels to prevent it from falling out.
Homeowners in Virginia Beach often opt for blowing in insulation instead of installing fiberglass blankets for several common reasons.
Unfinished Attics like in Chesapeake
Heat naturally rises, and if your attic is unfinished, it can escape, leading to higher energy bills. To address this, unrolling strips of fiberglass insulation across the square footage of your attic floor can create a blanket-like covering.
However, hauling heavy rolls up stairs, especially in crawl spaces, can be challenging and contribute to the already high crawl space insulation cost.
An alternative is using a thick layer of loose-fill insulation that can be quickly sprayed over the floor in a few hours. Additionally, you can install blown-in insulation over an existing fiberglass blanket to fill in crevices in the space. This provides a more efficient way to keep the heat in and energy bills down.
Older Homes Like Norfolk
While homes constructed after 1965 were mandated to have insulation, the guidelines for older homes varied and, in some cases, were non-existent, depending on the year and region.
To sidestep major renovation projects like tearing down walls for batt insulation, opting for loose-fill insulation is a practical alternative. For existing homes, blown-in insulation is ideal for filling those empty spaces between walls, ceiling joists, and existing insulation panels.
It’s crucial to bear in mind that old homes might have wires in unpredictable places. Therefore, it’s advisable to consult with a professional before drilling into the walls to ensure safety and proper installation.
FREE Insulation Inspection
When to Evaluate Your Insulation
Being aware that insulation can settle over time, here are some signs that your home in Hampton Roads might not be properly insulated:
– Higher than normal energy bills
– Noticeable drafts around windows and doors
– Uneven heat distribution throughout the rooms
– Cool and damp floors
Can You Install Blown-in Insulation Yourself?

While it’s possible to learn how to install blown-in insulation on your own, it’s generally not recommended due to potential health hazards associated with insulation. These hazards may include:
– Skin irritation and itchiness
– Burning eyes
– Throat irritation
– Lung problems
– Exacerbated asthma
– Coughing
– Potential long-term health risks like cancer
Given these risks, it’s advisable to hire professionals who have the expertise and the necessary safety measures to handle insulation installation safely.
Contact Universal Insulation Doctor for Trusted and High-Quality Service!
Make your home more comfy and energy-efficient with Universal Insulation Doctor! Are you dealing with problems like itchy skin, high energy bills, or rooms that just won’t warm up right? Our experts are here to help!
Here’s what Universal Insulation Doctor can do for you:
– Get advice from the experts about blown-in insulation to keep your home just the right temperature.
– Avoid health issues like itchy skin or sore eyes by letting our pros handle the insulation – no DIY worries!
– Our team will help you find and fix any problems with your insulation for a cozier home.
– Say goodbye to rooms that are too hot or too cold, drafty windows, and pipes that keep freezing up.
Want a home that’s super comfy, saves energy, and keeps you healthy? Take the first step – get in touch with Universal Insulation Doctor now. We’ll check everything out and give you personalized solutions to make your home cozy and cost-effective. Your comfort matters to us!
FREE Insulation Inspection
Frequently Ask Questions
What is the best type of blown-in attic insulation?
In Hampton Roads the choice of blown-in attic insulation is usually between cellulose and fiberglass. Both materials have their advantages:
- Cellulose: It's eco-friendly, made from recycled paper, and treated for fire resistance. Cellulose has a higher R-value per inch, providing effective insulation.
- Fiberglass: Cost-effective and widely used, fiberglass insulation consists of tiny glass fibers. It's known for its fire resistance and can be a good option if budget is a primary consideration.
Ultimately, the best type of blown-in attic insulation for you will depend on your priorities and budget. It may be helpful to consult with insulation professionals to determine the most suitable choice for your specific circumstances.
What is the average cost of blown-in insulation?
The cost of blown-in insulation can show significant variation, ranging from as low as $750 to as high as $5,800. The reason behind this wide range in installation costs depends on the specific area of your house being insulated, accessibility, and materials.
Insulating an attic is generally more straightforward than an exterior wall, and cost-effective materials can be utilized. Additionally, the total square footage of the space being insulated plays a crucial role in determining the overall installation cost.
How long does blown-in insulation last?
Blown-in insulation generally has a lifespan of 20 to 30 years, with fiberglass and rockwool potentially lasting up to 50 years. Despite these estimates, insulation may lose effectiveness over time. If it becomes moldy, damaged, settles, or falls to the bottom of a wall cavity, replacement or replenishment may be necessary, irrespective of its age. Regular assessments can help determine the condition of your insulation and whether any maintenance or updates are needed.
What is cheaper: blown-in or batt insulation?
In general, blown-in insulation is often considered more cost-effective than batt insulation for several reasons:
- Material Efficiency: Blown-in insulation tends to use less material compared to batts, which can be more cost-efficient.
- Installation Speed: Blown-in insulation can be installed more quickly than batts, reducing labor costs.
- Versatility: Blown-in insulation is versatile and can be applied to different spaces and irregular shapes more easily than batts.
However, it's important to note that actual costs can vary based on local market conditions, the specific insulation material chosen, and the expertise of the installer. It's advisable to obtain quotes from insulation professionals in your area to get a more accurate comparison for your specific project.
Is blown-in attic insulation worth it?
Investing in blown-in attic insulation proves worthwhile for many homeowners. Since a significant amount of heat is typically lost through the roof, improving attic insulation helps retain heat within your home. This not only enhances comfort in your living space but also results in reduced energy bills during the winter months.


